Installation
As one of the main pourposes of UFJF-MLTK is the easy of use, the compilation and installation can’t be different, for
that the project was made using the cross-platform build management tool cmake as most of the known C++ open source
projects.
Requirements
- CMake
- C++ compiler with support to C++17
- Gnuplot >= 5 (Optional, but needed for the Visualization module)
Build on any system
The project can be compiled using the same commands in any system, the only difference is that on Windows you’ll need
to make sure that the folder containing UFJF-MLTK is in your include path, so you can use include statements as
#include <ufjfmltk/Core.hpp>. For the standart instalation you only need to execute the following commands on
the project folder:
cmake -B build
cmake --build build
CMake can generate projects for several IDEs, if you have more than one C++ IDE in your operational
system you can especify which one you want to use by adding the flag -G to CMake, for example, if you want to configure the
project for Visual Studio, you could execute the command as cmake -B build -G "Visual Studio 16 2019" and then open the
generated project on it.
UFJF-MLTK was projected to be as modular as possible, so if you don’t want to compile some module, you could just turn off it’s configuration on cmake, keeping in mind that it would be compiled in the same way if it’s a dependency for another module to be compiled. The available options to be set on cmake are listed below:
| CMake option | Default value | Description |
| -DBUILD_LIBVISUALIZE | ON | Tells if the visualization module must be built |
| -DBUILD_LIBCLASSIFIER | ON | Tells if the classifier module must be built |
| -DBUILD_LIBREGRESSOR | ON | Tells if the regressor module must be built |
| -DBUILD_LIBCLUSTERER | ON | Tells if the clusterer module must be built |
| -DBUILD_LIBFEATSELECT | ON | Tells if the feature selection module must be built |
| -DBUILD_LIBVALIDATION | ON | Tells if the validation module must be built |
Including to your CMake project
Following are minimal scripts to include ufjfmltk to your CMake project. The first method is by simply cloning
ufjfmltk repository into the main project folder and include it with add_subdirectory, it’s a good method if
you wish to use the latest updates on the framework, but it may break your application in future updates.
cmake_minimum_required(VERSION 3.15)
project(project_name)
set(BUILD_SHARED_LIBS OFF)

set(CMAKE_CXX_STANDARD 17)

# mltk is a folder with ufjfmltk project
add_subdirectory(mltk)
add_executable(project_name main.cpp)
target_link_libraries(project_name ufjfmltk)
The second and most recommended method is by using FetchContent, with this approach you need to select one of the releases on the repository
and copy the link to its code tar.gz file, this way you garantee that your project will work even when the framework receive major updates.
cmake_minimum_required(VERSION 3.15)
project(project_name)
set(CMAKE_CXX_STANDARD 17)

include(FetchContent)
FetchContent_Declare(
        ufjfmltk
        # Specify the commit you depend on and update it regularly.
        URL https://github.com/mateus558/UFJF-Machine-Learning-Toolkit/archive/refs/tags/v0.52.7-beta.tar.gz
)
FetchContent_MakeAvailable(ufjfmltk)

add_executable(project_name main.cpp)
target_link_libraries(project_name ufjfmltk)
Adding UFJF-MLTK libraries to Windows environment
You need to enter into “System properties” and the environment variable CPATH with the value pointing to the folder containing the binaries, the default folder is “C:/UFJF-MLTK/bin”.
Compiling your project including UFJF-MLTK
With the libraries compiled and installed on the system you only need to add the UFJF-MLTK flag to the compiler to link the libraries to your program. Supose that we want to compile a source called foo.cpp containing a main function, to compile it on the command line, you just need to add the flag -lufjfmltk, for example, g++ foo.cpp -o foo -lufjfmltk and on Windows g++ foo.cpp -o foo -L<install_folder> -lufjfmltk.
Unix systems: g++ foo.cpp -o foo -lufjfmltk
Windows: g++ foo.cpp -o foo -L<install_folder> -lufjfmltk
With these steps complete, everything is set up and ready to use!
Going through installers
To make the framework installation easier for whom only whants to use the framework API, at each release are generated installers that installs the framework and make it available to all system. You can find all releases here.
Ubuntu and Debian based OS
Download the .deb file corresponding to the desired framework release and execute the following command.
sudo dpkg -i ufjfmltk-<version>-Linux-<cpu_architecture>.deb
Windows
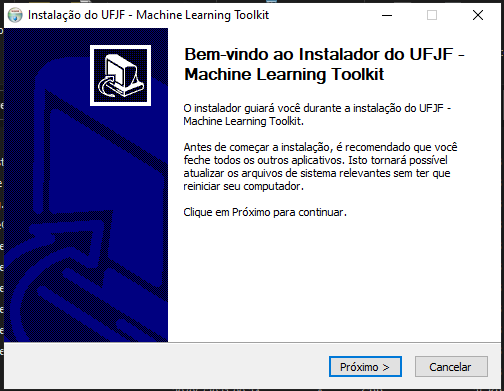
Fig. 1 1 - Click Next button.
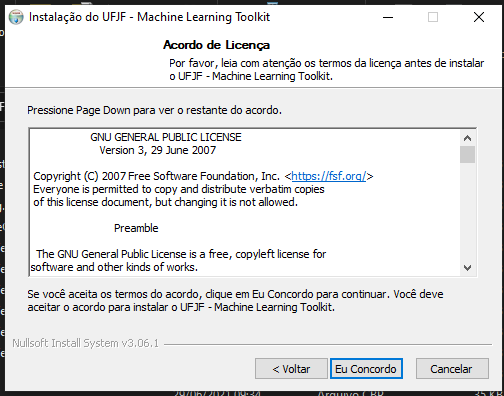
Fig. 2 2 - Click I agree button.
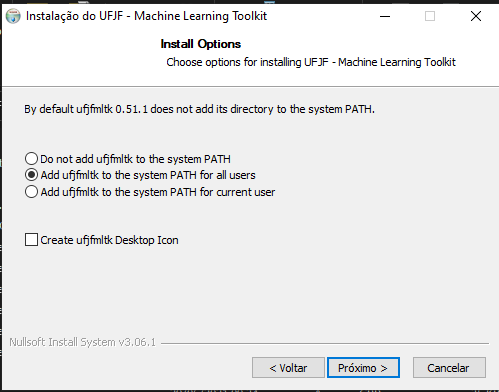
Fig. 3 3 - Add ufjfmltk to system PATH so it’ll be available to all system and click Next.
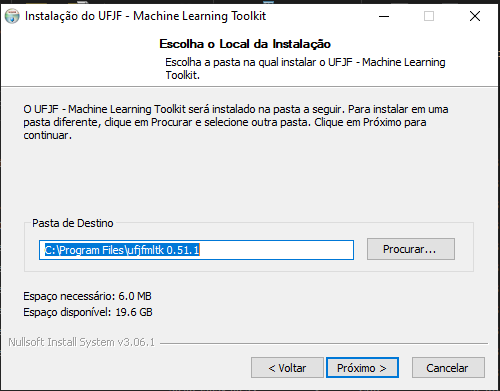
Fig. 4 4 - Click Next button.
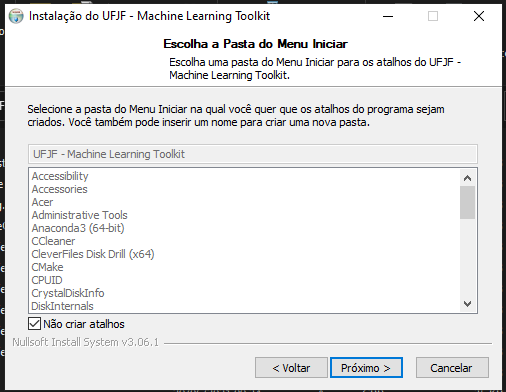
Fig. 5 5 - Check Don’t create shortcuts and click Next button.
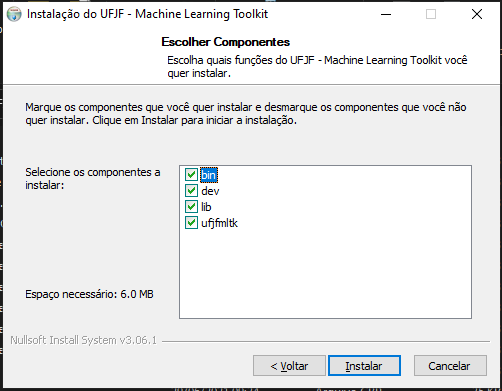
Fig. 6 6 - Click Install button.
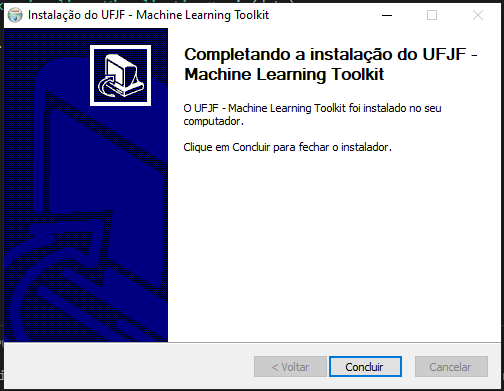
Fig. 7 7 - Click Finish button.
Other linux based OS
Download the .run file corresponding to the desired framework release and follow these steps.
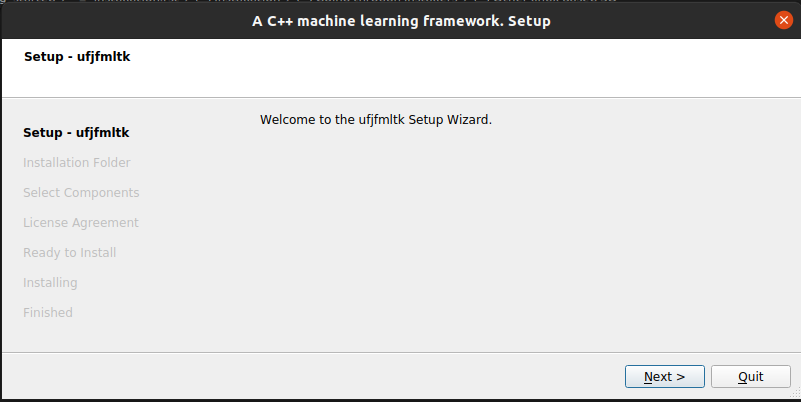
Fig. 8 1 - Click Next button.
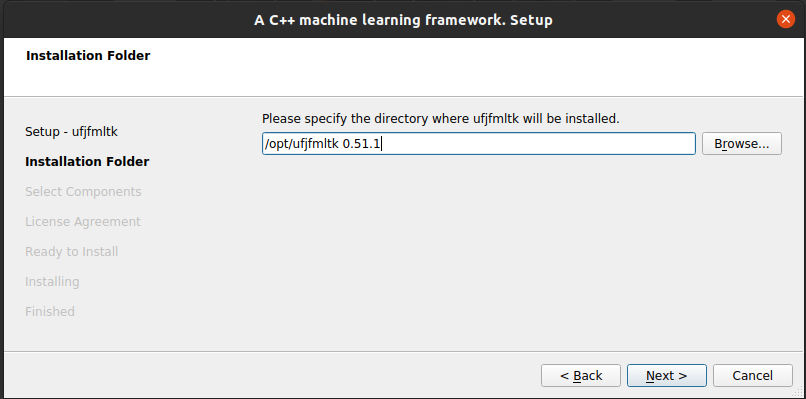
Fig. 9 2- Choose where do you want to install ufjfmltk.
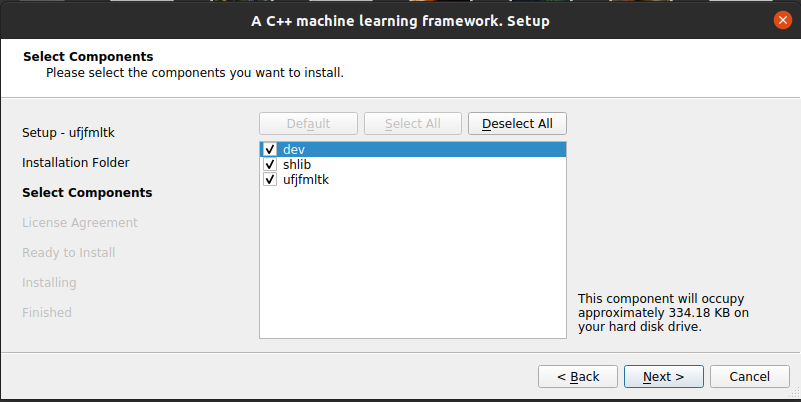
Fig. 10 3 - Click Next button.

Fig. 11 4 - Click Install button.
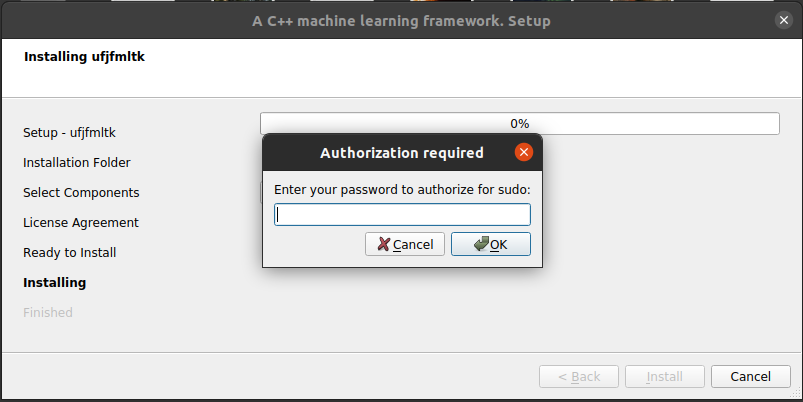
Fig. 12 5 - If you had choosen to install the framework in a system folder, you need to provide your sudo password.
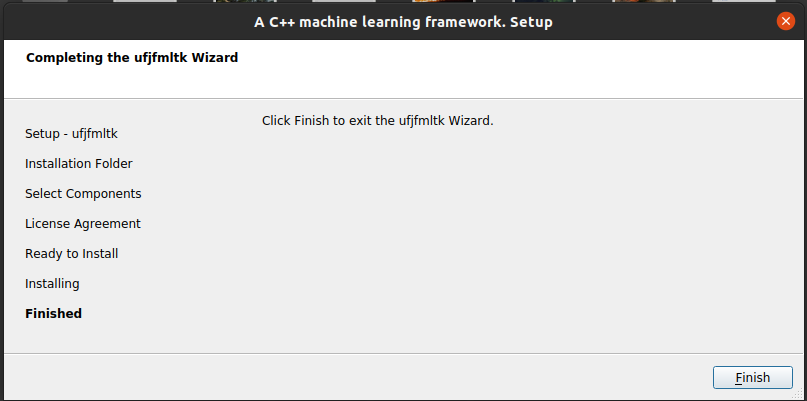
Fig. 13 6 - Click Finish button.